11 February 2013

Presents all around!

First up - The winner of the giveaway!
Random.org tells me that of the 24 entries, lucky 13 is the winner! How apt!
So... Janice. Check your email and we'll get this show on the road.


This weekend was the Boys birthday.
I made epic cake- Chocolate Orange Mousse Cake from Taste.


It is a flourless dark chocolate cake with orange zest, topped with chocolate mousse, topped with candied orange slices. EPIC.
I was supposed to leave it in the pan after it cam out of the oven, then put the mousse on, then take it out of the cake pan. But I didn't... which is why its not quite as pretty and straight sided as it should be. Still tastes awesome though!


08 February 2013

The road was long but I ran it...

Hey Janet?


Yes Brad?


I've got something to say...
 I really loved the skilful way 
You beat the other girls to the bride's bouquet! 


 The road was long but I ran it, Janet 
There's a fire in my heart and you fan it, Janet 
If there's one fool for you then I am it, Janet 
Now I've one thing to say and that's Dammit, Janet, I love you...


 Oh it's nicer than Betty Munroe had,oh Brad 
Now we're engaged and I'm so glad,oh Brad 
That you've met Mum and you know Dad, oh Brad 
I've one thing to say and that's Brad I'm mad for you too...


Here's a ring to prove that I'm no joker 
There's three ways that love can grow 
That's good, bad or mediocre 
Oh J-A-N-E-T I love you so


Just look at those welt pockets :)
Who cares if they're only for appearance.

Janet dress:
Butterick 4443 with white trim along princess seams, buttons, collar added, and belt with shrink-plastic buckle. Back invisible zip. Much shorter!
Hair clips also shrink plastic
First: Belt, princess seams, fully lined dress.

Brad Jacket:
Based on Colette Negroni shirt pattern. Collar accentuated. Front yoke and welt pockets added.
Could have done with adding a facing to the jacket, but I was running out of time.
First: Mens clothing, flat felled seams, invisible hem, welt pockets.

06 February 2013

Sew Grateful Freebie - Pin-Up Apron


Do you remember the hot apron I made?
Well, I immortalised the pattern and here it is for you to make your own!

You can download the pattern from here

It goes together pretty easily. I didn't take photos while I was making it, but I'll go through the steps.
A little boring maybe, but it should come together quite easily. The only weird thing is the pattern lay out- there are three portrait pages (match the numbers), and one horizontal which fits underneath (match the letters)
  1. Cut out fabric- You'll need one front piece, one back piece, two for the main waist band (these can be the same as the rest or contrasting, and you can chose the sweet heart shape or just straight), and four rectangles 7.5cm x width of your fabric (for easy tying). These can be as long or short as you want really, as long as you can tie them!
  2. Interface the waistband pieces. 
  3. Sew one waist band piece to each front and back piece. Hmmm. Probably have put some notches on. The base of the wasitband goes along the shortest curve of the main apron! You might find it easiest to not pin this, and instead sew slowly and keep adjusting the fabric so that the straight waistband sits nicely against the curved apron top.
  4. Put the font and back pieces right-side together and sew across the top (carefully following the sweetheart shape, and around the main apron panel  leaving the sides of the waist band open to allow turning out and insertion of waist ties.
    If you're adding trim, this is when you should add it! I find it easiest to baste the trim onto the edge of the right side of the back panel  so that the edge you want sticking out is on the inner most edge (i.e. not sticking out yet). Then place the front panel on top, right sides together- you shouldn't be able to see any trim!
  5. Clip the seam allowance and then turn out through one side of the waist band. Ease any curves out by rolling with your fingers and then pressing. You might need to use a blunt pencil, small crochet hook/point turner to make the most of the sweat heart waist band.
  6. Sew up ties- place two long thin rectangles rightside together, and sew along 3 sides. You can shape the end of the ties if you wish, I do! Then clip the corners, turn out and press.
  7. Fold under the seam allowance on the waistband, insert the raw end of one tie in each side and sew in place. There should be no raw edges visible, they should all be inside the apron.
  8. Top stitch along waistband and out along ties. 

05 February 2013

How you helped me learn to sew and made the world a nicer place

Today is all about reflecting on the things in our life that we are "Sew Grateful" for:

I learnt my way around a sewing machine at school- I did textiles as a GCSE, but we did more practical/home dec sewing than clothing sewing. I made a kids educational toy and a wall hanging storage thing with lots of different style of pockets. So I knew how to make the machine work, but the idea of sewing my own clothes was still alien.

As the years progressed there were lots of costume parties that maybe involved some refashioning, but then I was a bridesmaid for a friend and my contribution to the burlesque themed hen night was her outfit. I bought my first cheapo sewing machine, googled and googled, and decided we needed ruffle skirts.


My first real experience of the generosity of the sewing community - An awesome tutorial for making burlesque skirts, freely available to help novices like me. Some nice person (Becca K) had spent time putting together a tutorial. At the time I didn't realise how much work this must have involved. But I was grateful to have this guide to help me.

Buoyed up on this experience, I dabbled with some other projects to get my hand back in, like Made-By-Raes Buttercup bag and many pairs of PJs from the wonderful tutorials out there.


Time passed. 

Life moved on.

The Boy proposed :D
No... I didn't make a wedding dress.
But it did spur me on to make a dress-


For our fun and games engagement/residency/birthday party...
My first experience of darts and fitting and zips and facing.
All well explained by Elaine and the Burda technique pages.
And I haven't looked back.

So thanks to all of you for:

The resources that people put out there for free.
And the time they spend doing it.

The good work that you put your sewing to, like Project Linus or the money raised by Wonky Wilma.

The comments, criticisms, ideas and suggestions that are left on blogs, forums, flikr groups and Burdastyle.

The challenges and sewalongs that help us to push our boundaries.

The sewing-types that I've had the pleasure to get to know in real life. Its so nice to talk sewing with people who don't just look at you funny and raise eyebrows.

Helping me learn new skills and keeping my brain and my fingers busy!


04 February 2013

~*NOW CLOSED* ~Sew Grateful - Lets start with a giveaway!

Are you excited?

 Its time for Sew Grateful Week.

If you haven’t come across it before, the idea is over the week we show how grateful we are for the online sewing community.

 But I was scratching my head, wondering what to giveaway. I don't have a massive stash of anything, and lets face it- if I want to give them away, why would you want to receive them?! But I am grateful for the sewing community, so I'm giving away something I don't really want to give away. Remember I said I had some fabric left from the Pin-Up Aprons?


Well....


It could be yours. 


As far as I know its not available in Australia, so here is your chance to grab a little bit of tacky goodness!
You know you want it. Maybe a kinky lining for a bag or jacket, or wear it loud and proud on the outside.
There is just over half a meter up for grabs.

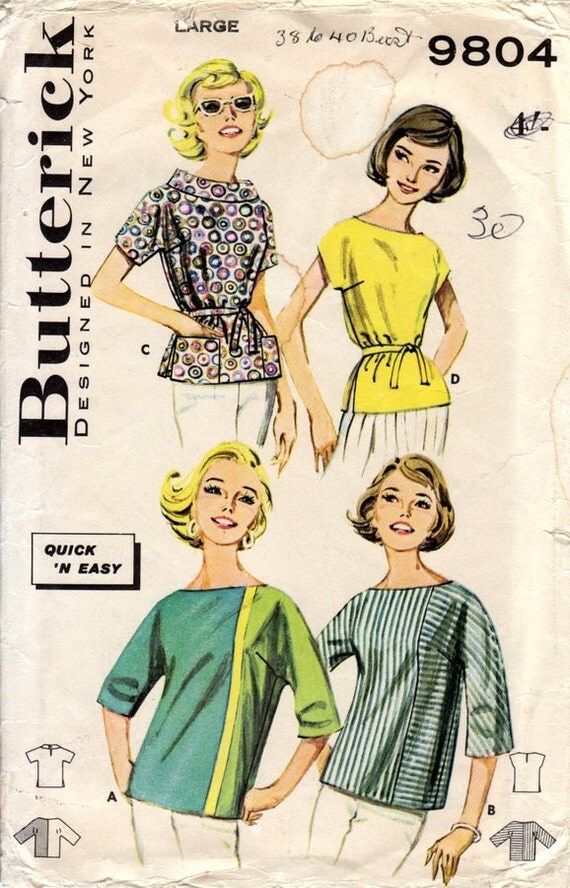
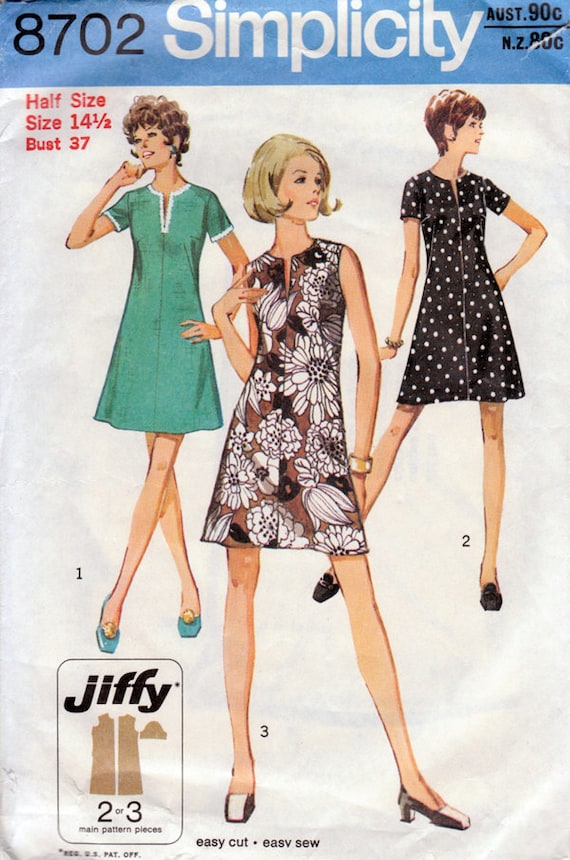
Also up for grabs are two lovely 1970s patterns-


All you need to do is be following the blog and leave a comment. 
Let me know that you've spread the word for an extra entry!
Closes midnight sunday (West Australian time).
Open to all. Make sure there is a way I can get in touch with you- either through your blog or leave an email address.

02 February 2013

I think its time to admit I have a problem...

My local Op-Shop sell fabric for $1 per piece, regardless of piece length.

Its getting bad.

Just today, I grabbed 4 remnants- the ones on the right. I only went in to see if they had any knitwear. The other four are recent purchases.


The rest is recent haul. The red is cotton stretch sateen, about 1.5m and really wide. I'm hoping to manage a princess seam dress from it. Because every girl needs a red dress, right?

The frogs are flannel, perfect for baby clothes or maybe some new me PJs. or both. There is plenty.

The pink with the roses was a steal, one of those moments where you feel you should force them to take more money... Its stretch sateen, >2.5m of it. I'm not sure if that dusky rose will suit me, but I'm willing to give it a try for a dollar. I did think I could maybe try dying to too, because I love those roses.

The green is aweome, but I have no idea what to do with it. I thought  it was silk, and from the results of the burn tests I'm nearly sure it is. But its lime green...


The flimsy synthetics I chose for their pretty large scale floral prints, especially the blue one. Its sooo pretty! I'm thinking the top from the colette book for them, to maximise the pretty print.


Do you have a place that makes it that bit too easy to add to the stash?
or how about an idea for what to use some of this fabric for?!

01 February 2013

Bits and Bobs

Quite a lot of sewing going on here.

For my Janet Dress, I've ended up using a princess seamed bodice pattern (B4443) rather than a darted dress so I could add the white contrast more easily. The real Janet dress has full length sleeves. But not in Perth in Summer!


The fabric was $4 a meter, so the whole fully lined dress will probably come in at less than $20. I still need to find a white cardigan though :S


I don't think I will be able to find the Boy a jacket for his Brad, though I did manage to find some pants and glasses at the Salvos that will be perfect. I bought some tan cotton sateen from Homecraft Textiles and also spotted the Colette Negroni pattern for half price, so bought that with hopes of using it to make the Boy a shirt for his birthday (he never wears shirts, but I fancy the challenge) and maybe using it to base the jacket from. It arrived super quick and looking very pretty:


I also finally got around to making the cushion for the basket chair in my little retreat. I've had the fabric for ever, and always planned to make it kind of crazy patchwork with some solid blue. That always seemed a little complex, so I never actually did it. Lucky I didn't, because I've since found that the solid blue fades really easily in the sun, while the print seems to be holding up quite well. It took about 2 hours all up, including 5 buttonholes down the back so I can wash it easily, and covering the HUGE button on the front.
Totally should have done it ages ago. It looks so much better than the duvet cover  it came with (off gumtree) or just throwing a blanket over!


And last but not least I sewed up the bag that came with "SEW" by Kath Kidson (a present from my MIL). I added a full lining in white poly-cotton poplin (the lining of the Janet dress) and a key strap because no matter how small a bag is I still always manage to lose my keys.


I quite like the look of it, and its a great size. The only downside is that I'm not really into the shabby-chic look so it goes with nothing in my wardrobe. I have some dinosaur canvas/cotton duck, maybe I will try another in that!